
Troubleshooting Guide: Fixing mywifiext Not Working Issue

 If you’re encountering issues with mywifiext not working, frustration can quickly set in. However, fear not! In this comprehensive guide, we’ll walk you through the steps to troubleshoot and resolve the mywifiext not working problem, ensuring a seamless and reliable connection to your WiFi extender. Call us at +1855-201-8071 today, and our knowledgeable professionals will guide you through the troubleshooting process to ensure a swift resolution.

  1. Check Your Connection: The first step is to ensure that your device is properly connected to the network. Verify that your computer or mobile device is connected to the WiFi network generated by your extender. If not, reconnect and try accessing mywifiext again.
  2. Browser Compatibility: Some users experience issues due to browser-related problems. Ensure that you are using a compatible browser (commonly recommended browsers include Google Chrome, Mozilla Firefox, or Safari). Clear your browser cache and cookies to eliminate any potential conflicts.
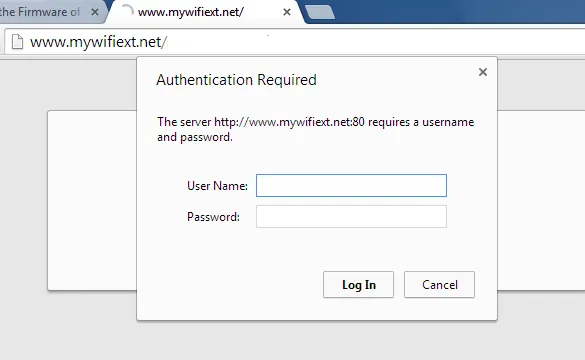
  3. Access the Correct Web Address: Double-check that you are entering the correct web address for mywifiext. It should be “http://mywifiext.net/" or “http://mywifiext.local/". Incorrect URLs can lead to connection problems.


  4. Update Browser and Firmware: Ensure your browser and WiFi extender firmware are up to date. Outdated software can lead to compatibility issues. Check for the latest updates for both your browser and the extender’s firmware, and apply them if necessary.
  5. Disable Firewall and Antivirus: Sometimes, security software can interfere with the mywifiext setup process. Temporarily disable your firewall and antivirus software, and attempt to access mywifiext again. Remember to re-enable these features after the setup is complete.
  6. Use a Wired Connection: If you’re facing persistent issues, try connecting your computer or laptop directly to the extender using an Ethernet cable. This eliminates potential wireless connection problems during the setup process.
  7. Power Cycle Your Devices: Turn off your WiFi extender, router, and connected devices. Wait for a few minutes before turning them back on. This simple power cycle can resolve various connectivity issues and refresh the network.
  8. Factory Reset: As a last resort, if none of the above steps work, consider performing a factory reset on your WiFi extender. Keep in mind that this will erase all previous settings. Refer to your extender’s user manual for instructions on how to perform a factory reset.


Conclusion: By following these troubleshooting steps, you should be able to address the mywifiext not working issue and enjoy a seamless connection to your WiFi extender. If problems persist, it may be advisable to consult the manufacturer’s support or seek assistance from technical experts to ensure a swift resolution. Remember, patience and persistence are key when troubleshooting network-related issues.

https://networktechblog.com/mywifiext-not-working/

Comments

Popular posts from this blog

How to Reset Linksys Extender

  Linksys Extender is a device that is used to extend the range of your wireless network. Sometimes, you may experience issues with your Linksys Extender, such as a weak signal, inability to connect, or slow internet speed.  Comment Linksys Extender reset In such cases, resetting Linksys Extender can help to resolve these issues. In this article, we will discuss why we need to reset Linksys Extender, common issues that can be resolved by resetting, troubleshooting, the hard reset process, and the soft reset process. Why do we need to reset Linksys Extender? There are several reasons why you may need to reset your Linksys Extender. The most common reasons are: Network Issues: If you are experiencing issues with your wireless network, such as a weak signal or inability to connect, resetting your Linksys Extender can help to resolve these issues. Firmware Issues: If your Linksys Extender is not functioning properly due to a firmware issue, resetting it can help to resolve the iss...

How to Setup WiFi Extender TP-Link

  In this blog, we'll walk you through the process of setting up your TP-Link WiFi Extender using either the Ethernet or WPS method. Follow the instructions below to install your extender successfully: TP-Link WiFi Range Extender Setup - How to Connect with Router- There are two methods for setting up the extender: the manual method using an Ethernet cable, and the WPS method. Both methods are described below, so you can choose the one that works best for you. TP-Link WiFi Extender Setup Manual Method (With Ethernet Cable)- To begin the TP-Link WiFi Extender setup with an Ethernet cable, connect the extender to your computer using an Ethernet cable, and then follow these steps: Power on your TP-Link WiFi extender. Connect it to your computer using an Ethernet cable. Open any web browser and type " 192.168.0.254 " in the URL box to access the TP-Link web page. Select quick setup and then click on next. Choose your region and then click on next. The TP-Link extender will s...

A Comprehensive Guide to Xfinity Router Login

  Optimize your home network with ease using the Xfinity Router Login. Unlock advanced features, enhance security, and customize settings for a seamless online experience. In this blog post, we’ll delve into the essential steps of the   Xfinity Router Login   process, empowering you to optimize settings, enhance security, and unleash the full potential of your home network. Understanding Xfinity Routers: Xfinity routers, provided by Comcast, are a key player in the realm of home networking. They boast advanced capabilities that allow users to manage and customize their network settings for optimal performance. The first step to harnessing this power is gaining access to the router’s administrative interface. The Xfinity Router Login Process: Connectivity Check:  Before diving into the login process, ensure that your device is connected to the Xfinity router either via an Ethernet cable or through a secure Wi-Fi connection. Accessing the Router’s Interface:  Open...